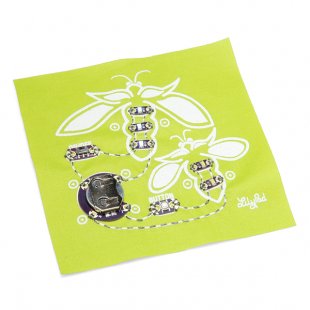
What exactly is LilyPad?
LilyPad is a wearable e-textile technology manufactured by Leah Buechley and cooperatively designed by Leah and SparkFun. The LilyPad brand includes serveral microcontrollers produced by the Arduino task. Each LilyPad product had been creatively designed to have big connecting pads to enable them to be sewn into garments. Various input, result, power, and sensor boards are available. They’re also washable!
LilyPad boards make it simple to add life towards wearables with selection of sensors, LEDs, buzzers, and lots of other feedback and production devices. Incorporating a microcontroller supply complete control over the design and behavior of your task!
Sewing Recommendations
Methods For Effective Sewing
- Be sure to pull your thread all the means throughout your fabric to eradicate free stitching traces.
- Make sure to cinch each stitch tight to help keep a good link.
- Loop your bond around each pin 2-3 times to make a secure link.
- Keep your stitches near collectively, while making yes the spaces aren’t too big.
- Cut your knots right down to maintain your traces from touching each other. The cleaner you retain your traces the greater the chances are of having any project to function from the first try.
- There’s a tendency to cover stitches, and hidden stitches are hard to troubleshoot. If you’re planning cover a stitch in the fabric make sure to look at the trace before addressing it along with other fabric.
LilyPad Tips
There are a few things that tend to be helpful to keep in mind when working with LilyPad components and e-textiles as a whole:
- Cannot sew any components in with all the electric battery set up. There isn't any danger of getting hurt, you might strain the battery.
- There are lots of types of bond. Compare surface, thickness, and resistance to make sure you select correct one for your project.
- Any time you make a match up between an element as well as the bond, make a couple of loops through the connection hole. The section of material on the exterior associated with the link opening is where current will flow involving the thread and the element. Usually, when there is a quick or break-in your circuit for the reason that the conductive bond cannot constantly touch this pad regarding the element.
- Stainless-steel threads are designed for the heat of a soldering iron just fine, but that doesn’t suggest the fabric of task can; be mindful!
- Threads of any material having a nylon or cotton fiber base is not soldered. The non-metal materials will go up in smoke!
- When you have two threads that want to cross, there must be an insulator between them, otherwise the circuit will not work. Attempt some textile, a layer of glue or paint, or a tube of heatshrink.
- There are some other conductive e-textile materials like buttons, material, yarn, paint and velcro. There are many different approaches to utilize the materials as switches, sensors plus. Have fun and research!
Troubleshooting
When you're sewing together your project you could come across a few snags on the way. There are some techniques to troubleshoot typical sewing blunders.
- Running-out of thread: Loop all over current bond around three to four stitches straight back. Follow that sewing trace so your two outlines tend to be parallel and touching.
- Bypassing the switch: make use of some cable or built-in circuit hooks to jump individual elements straight to the battery or perhaps the microcontroller. This can let you know if stitch and/or component may be the problem.
- Loose sewing traces: Pull every little thing tight with tweezers or your sewing needle to tighten up the stitching traces. It's also possible to sew extraordinary of a preexisting trace.
- LEDs not working? Double-check your polarity.
latest post
-
 Ritsuko Hirai February 22, 2016
 -
 Textile Product Design September 23, 2018
 -
 Designing fabric Prints May 4, 2016
 -
 Textiles for Interiors August 7, 2015
 -
 Textile Design Art January 15, 2017
 -
 MA Textile Design July 8, 2016
 -
 Textile business October 6, 2016
 -
 Interiors and Textiles February 19, 2018
 -
 New textile Designers December 21, 2015